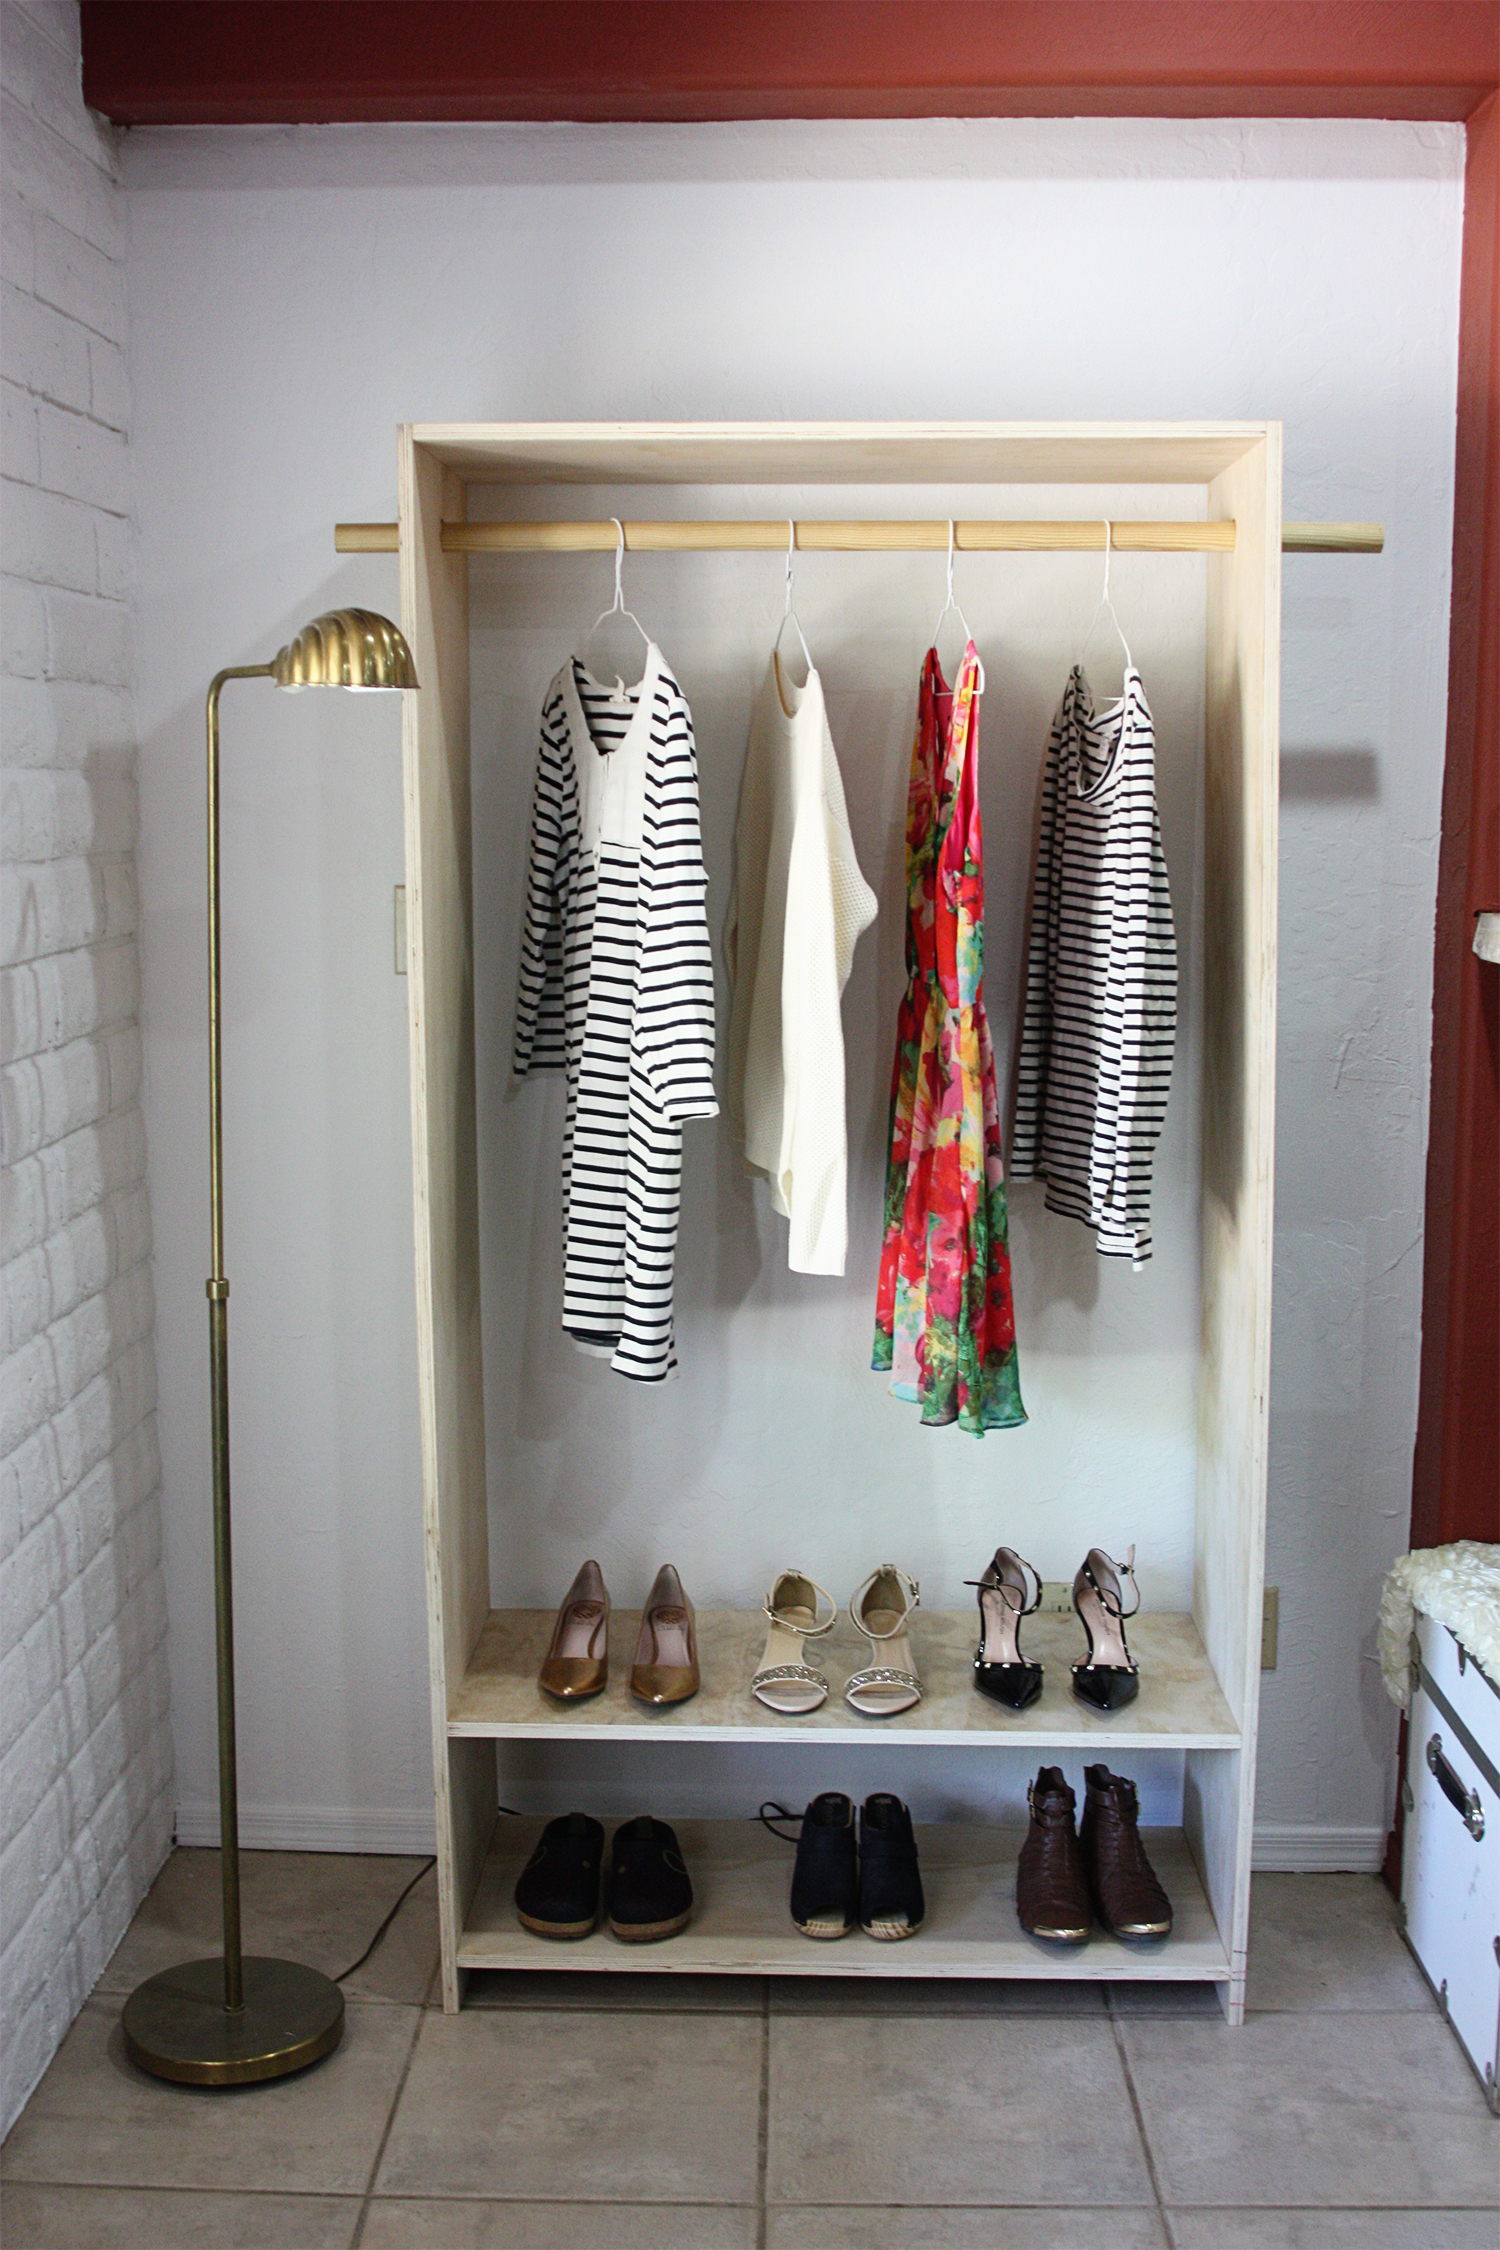
My husband, Scott, and I are always dreaming, drawing and thinking of projects we can work on together. Lately I’ve been wish for a little extra closet space, but wanted something pretty that I could put on display in our living area. So Scott and I sat down and sketched out a simple wardrobe that he could whip up for me in an hour or so. We thought this would be the perfect project to initiate our DIY collaborations, and we hope you love it too!
Supplies:
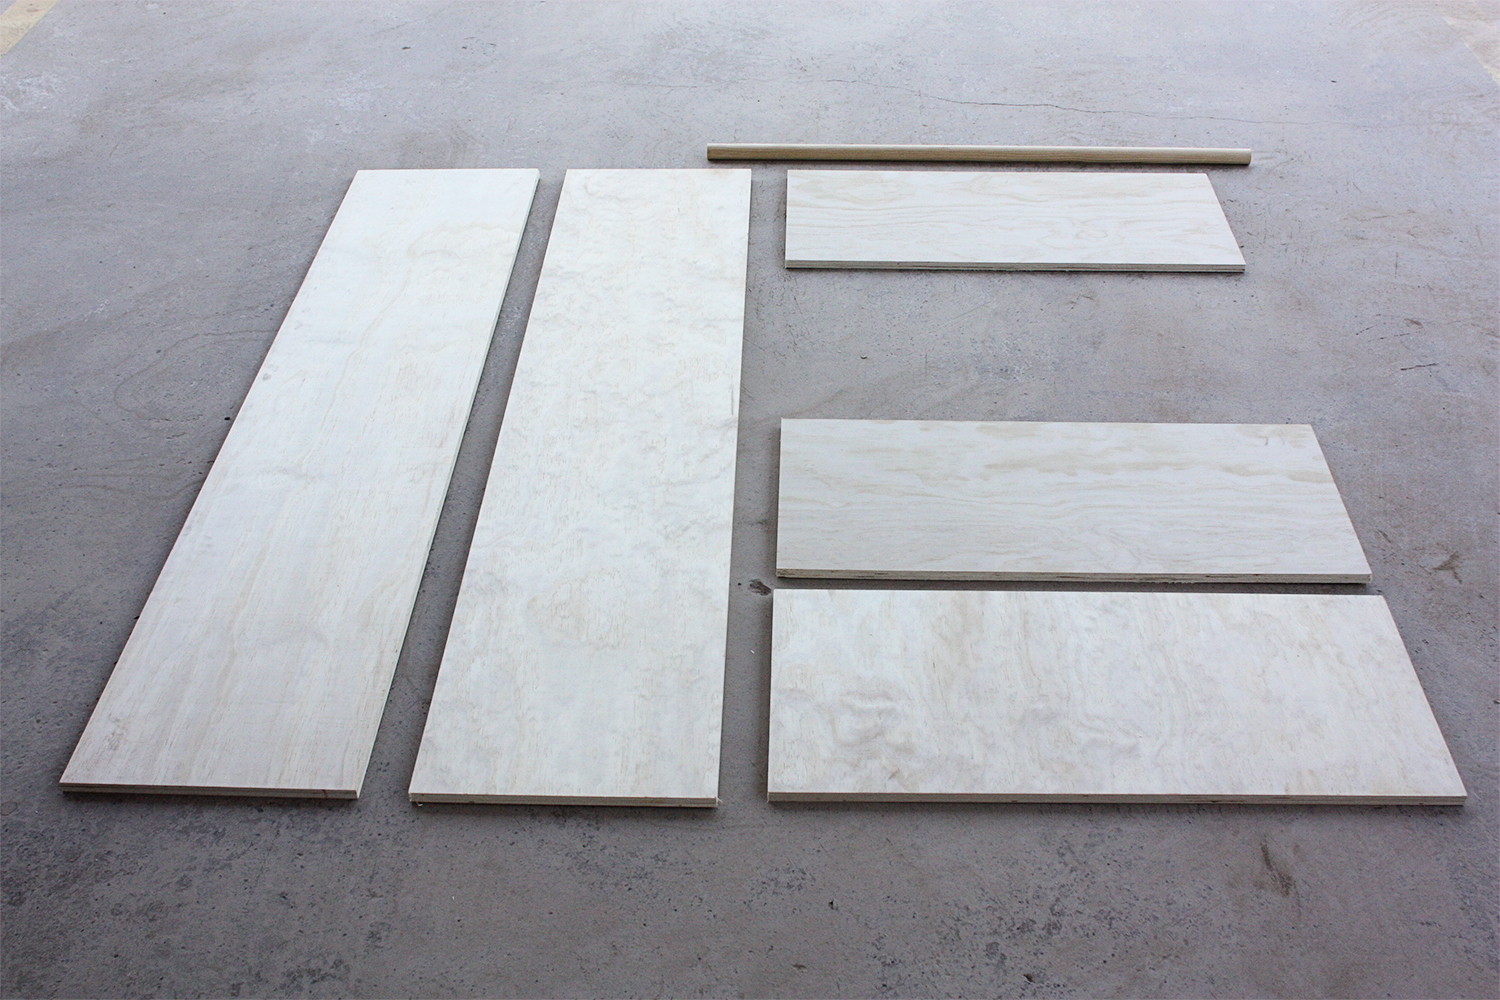
– One 23/32 in. x 4 ft. x 8 ft. sanded plywood
-Cut into two 6 ft. x 16 in. pieces (cuts can be made at most hardware stores)
-Cut into three 3ft. x 16 in. pieces (cuts can be made at most hardware stores)
-One 1 1/2 in. x 4 ft. dowel
-Twelve 2 in. wood screws
Tools:
-Circular saw (if you need to make your own cuts)
-Drill
-1 1/2 in. wood boring bit
– 1/16 in. drill bit
-Marking pencil
-200 grit sanding block
-Table clamp
-Scrap wood for straightedge (if making own cuts)
-Tape measurer (not pictured)

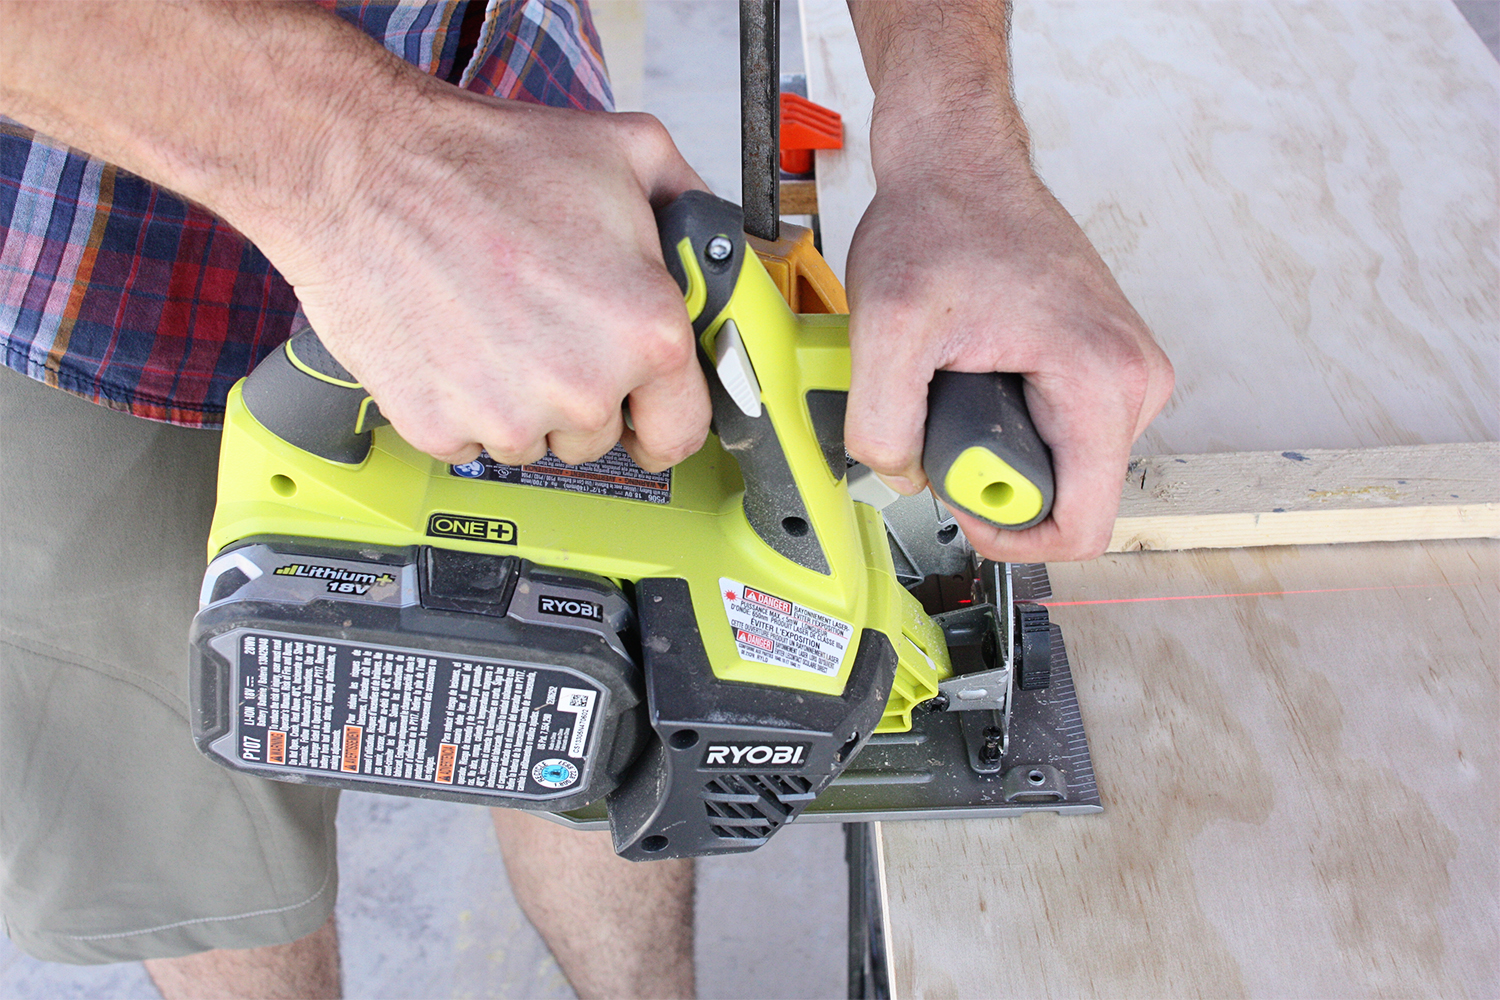
Step One: If you plan on making your cuts at home use the circular saw, keeping dimensions in mind.
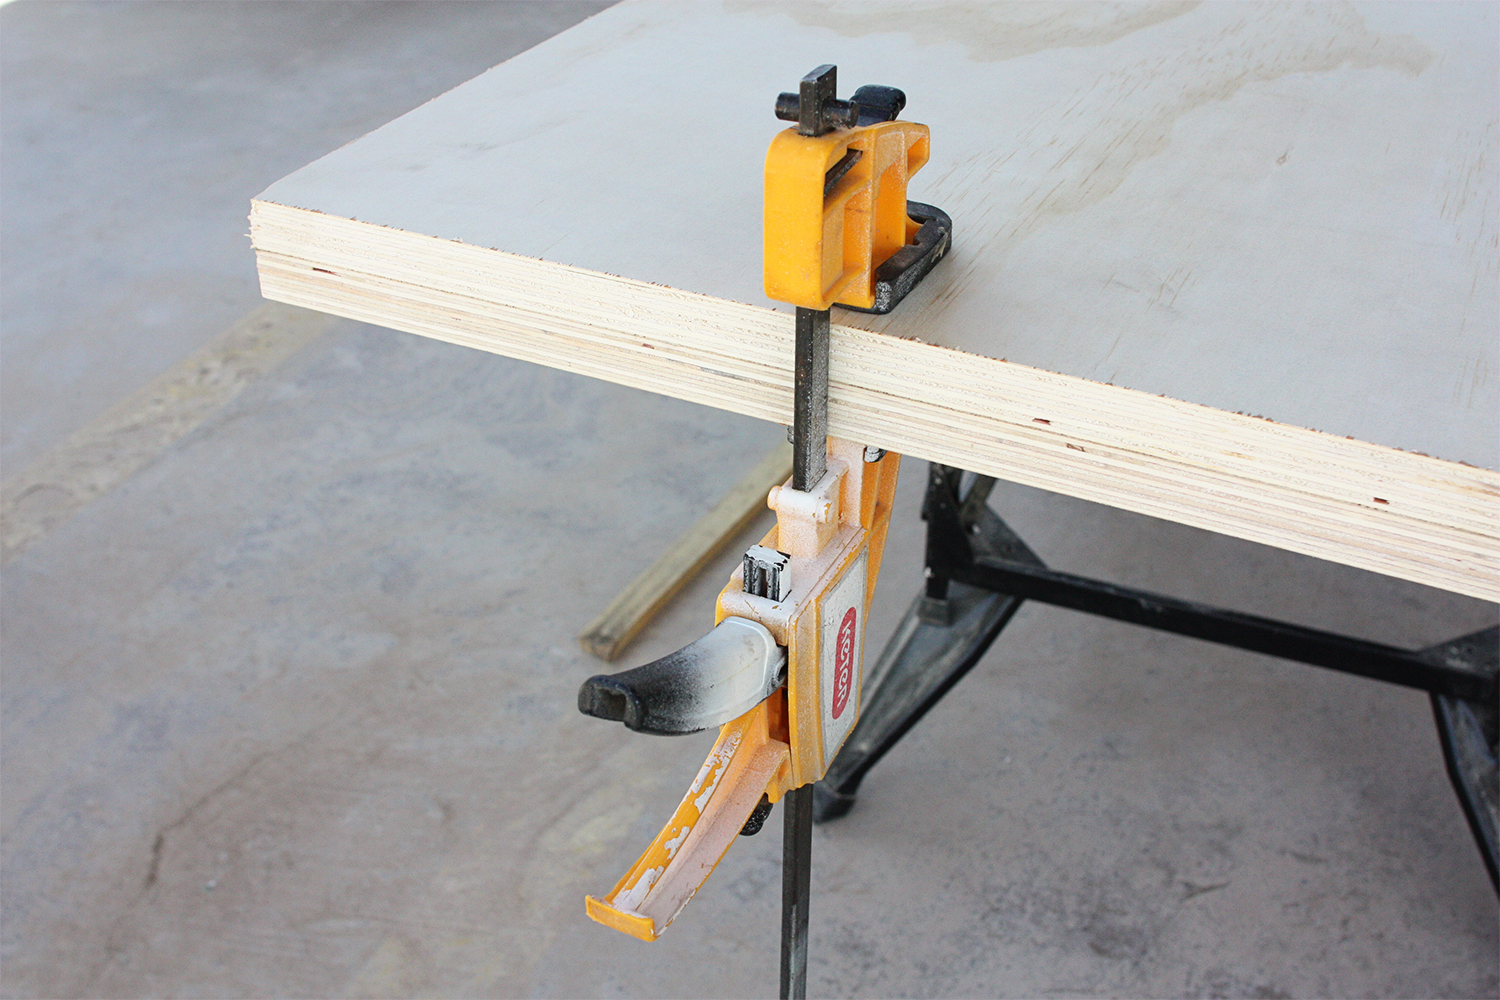
Step Two: Clamp two vertical sides together.

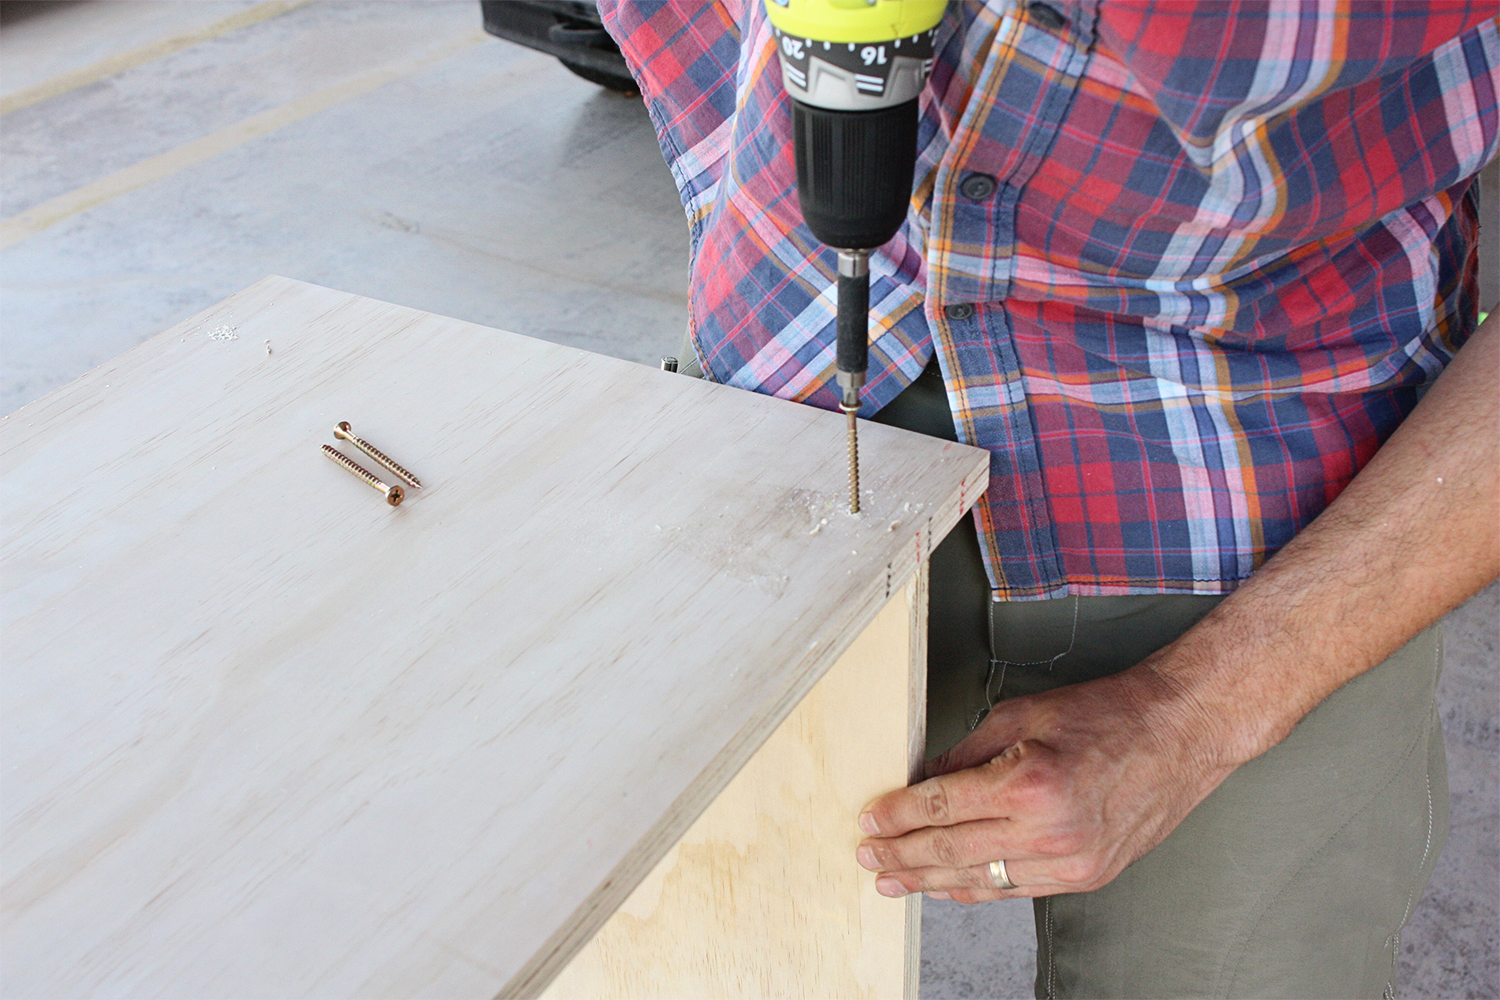
Step Three: Mark pilot holes three inches in from the edge.
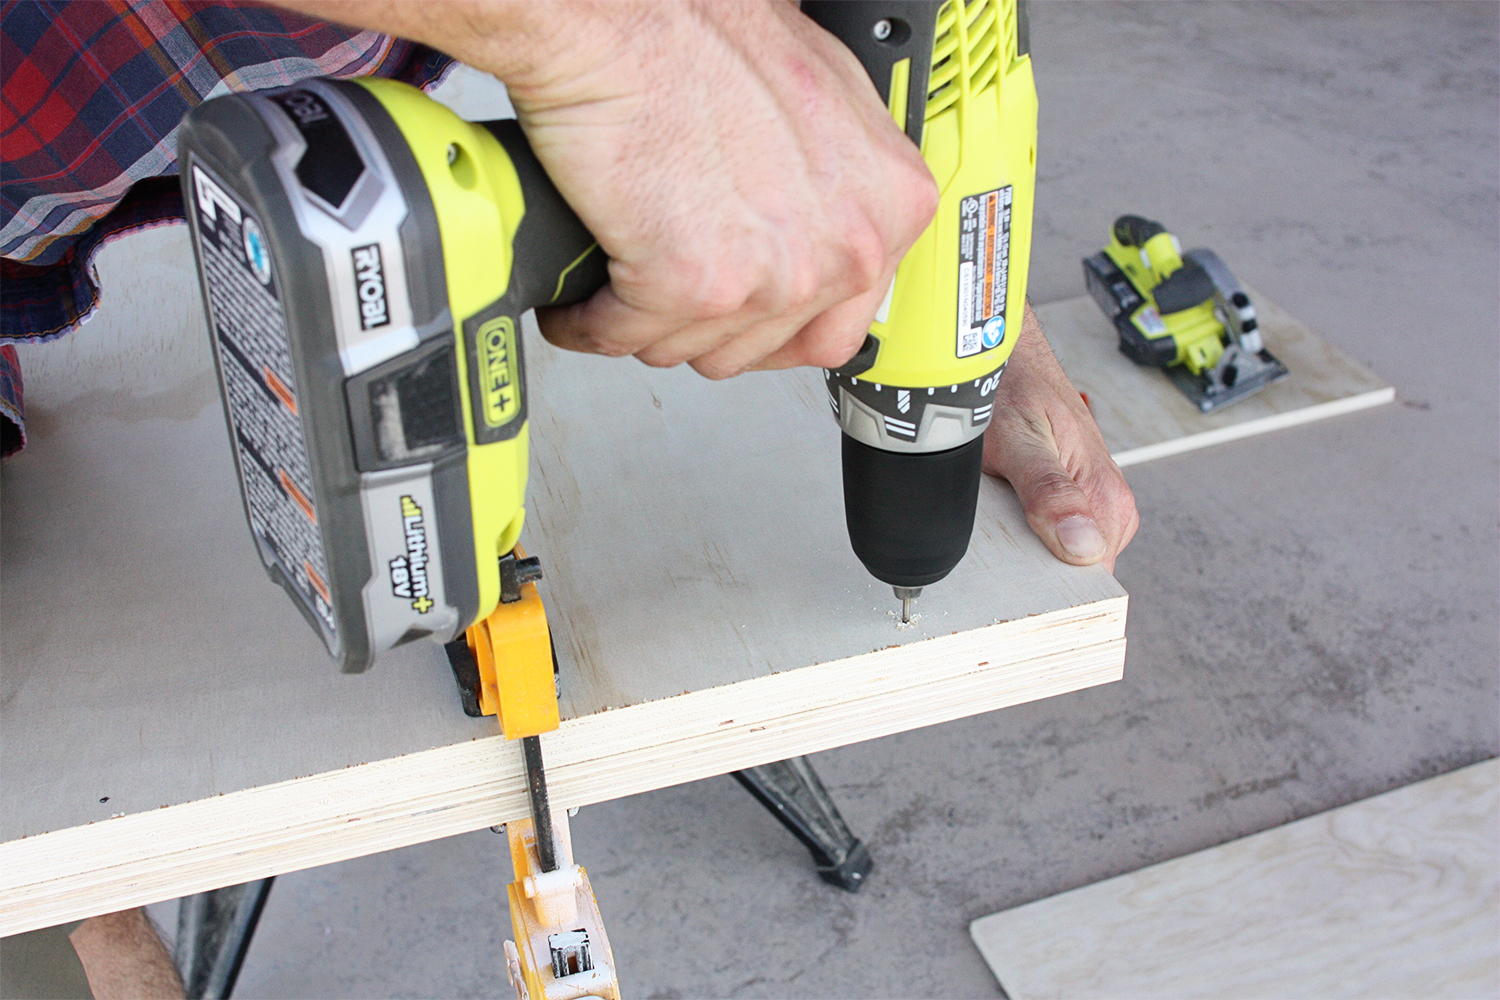
Step Four: Drill pilot holes through both pieces of wood.
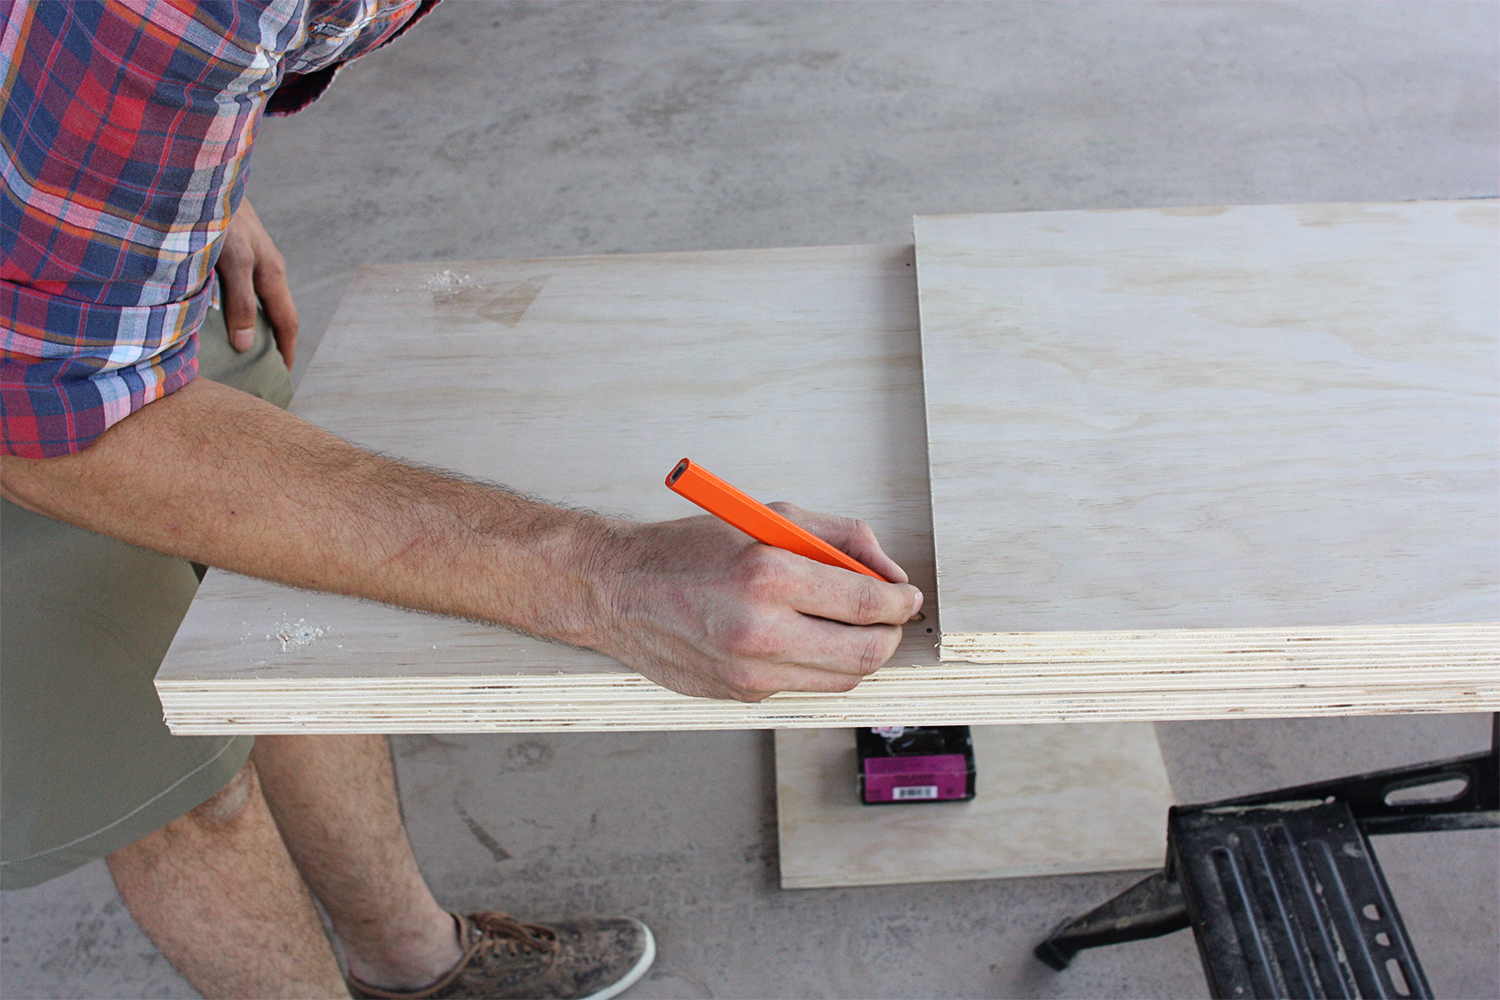
Step Five: Repeat pilot marks and holes for the bottom two shelves. We made our shelves a foot and a half a part.
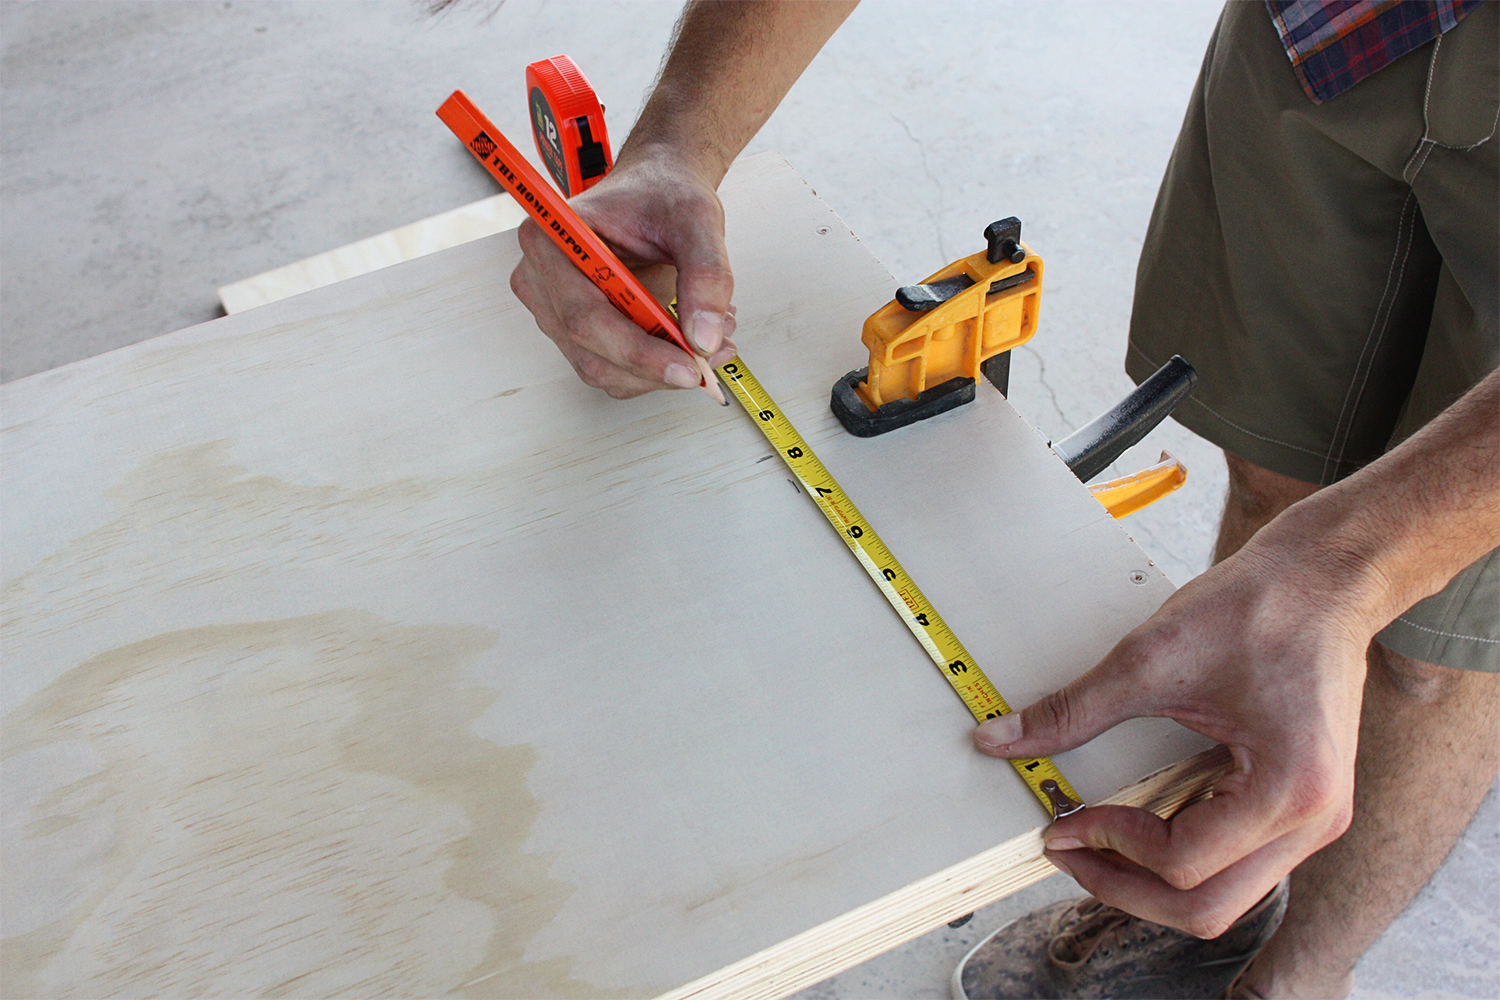
Step Six: At the top, use a tape measurer to find the center. The center will be 8 inches in and 4 inches from the top.
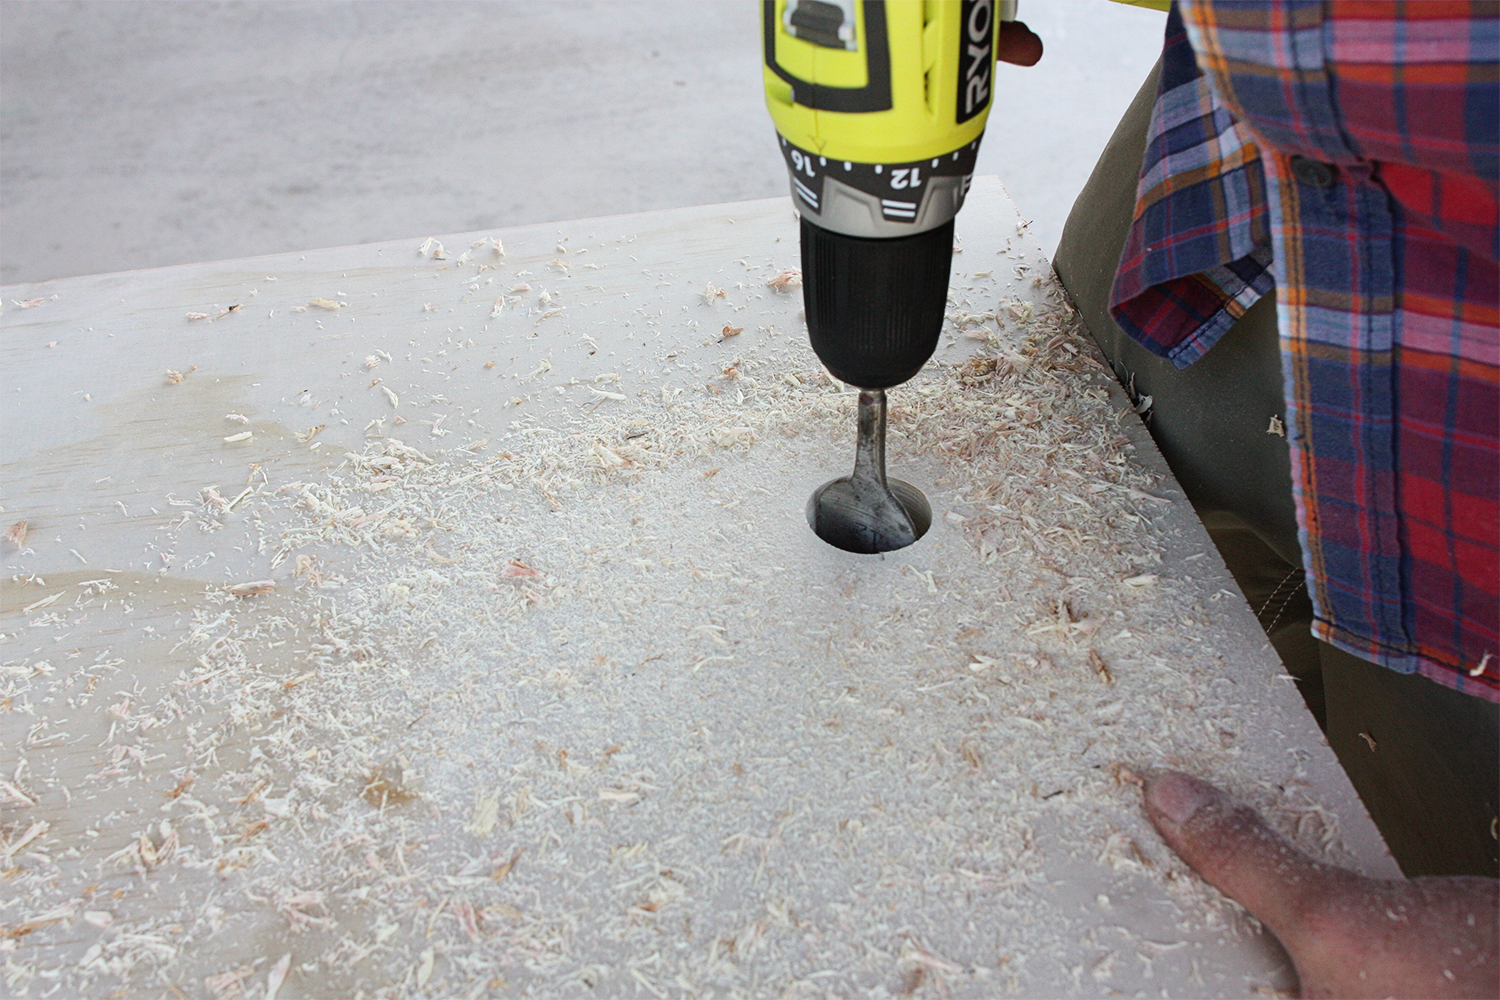
Step Seven: Using the boring bit, drill through both vertical pieces of wood. Dust off excess sawdust once done.

Step Eight: Assemble pieces! Use a table (or a friend) to sturdy the pieces.
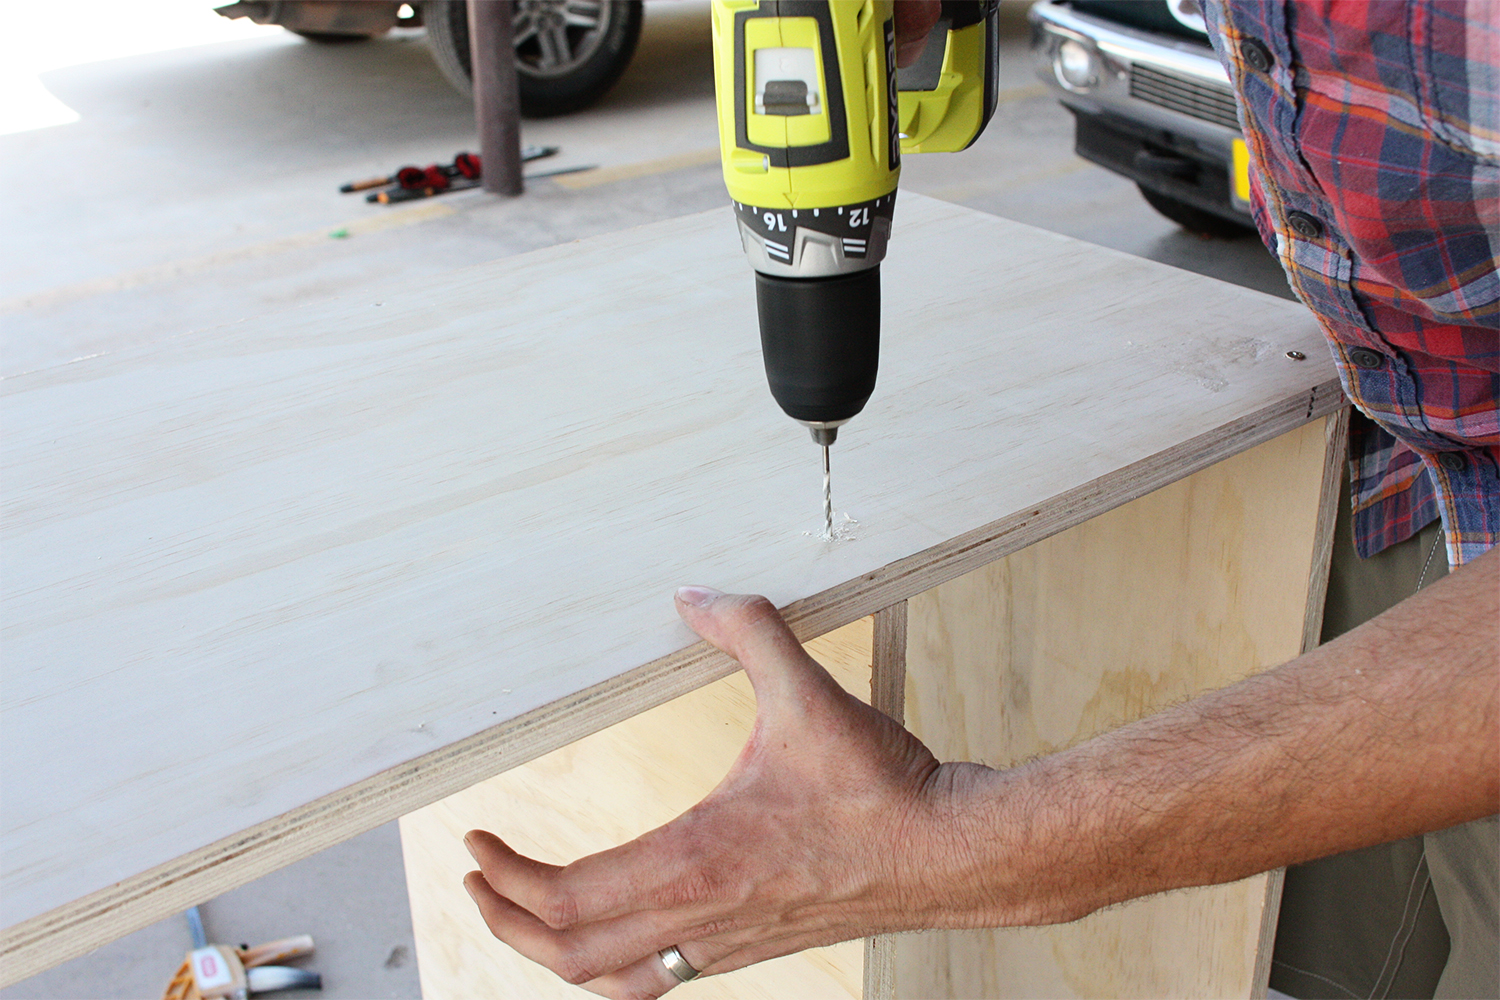
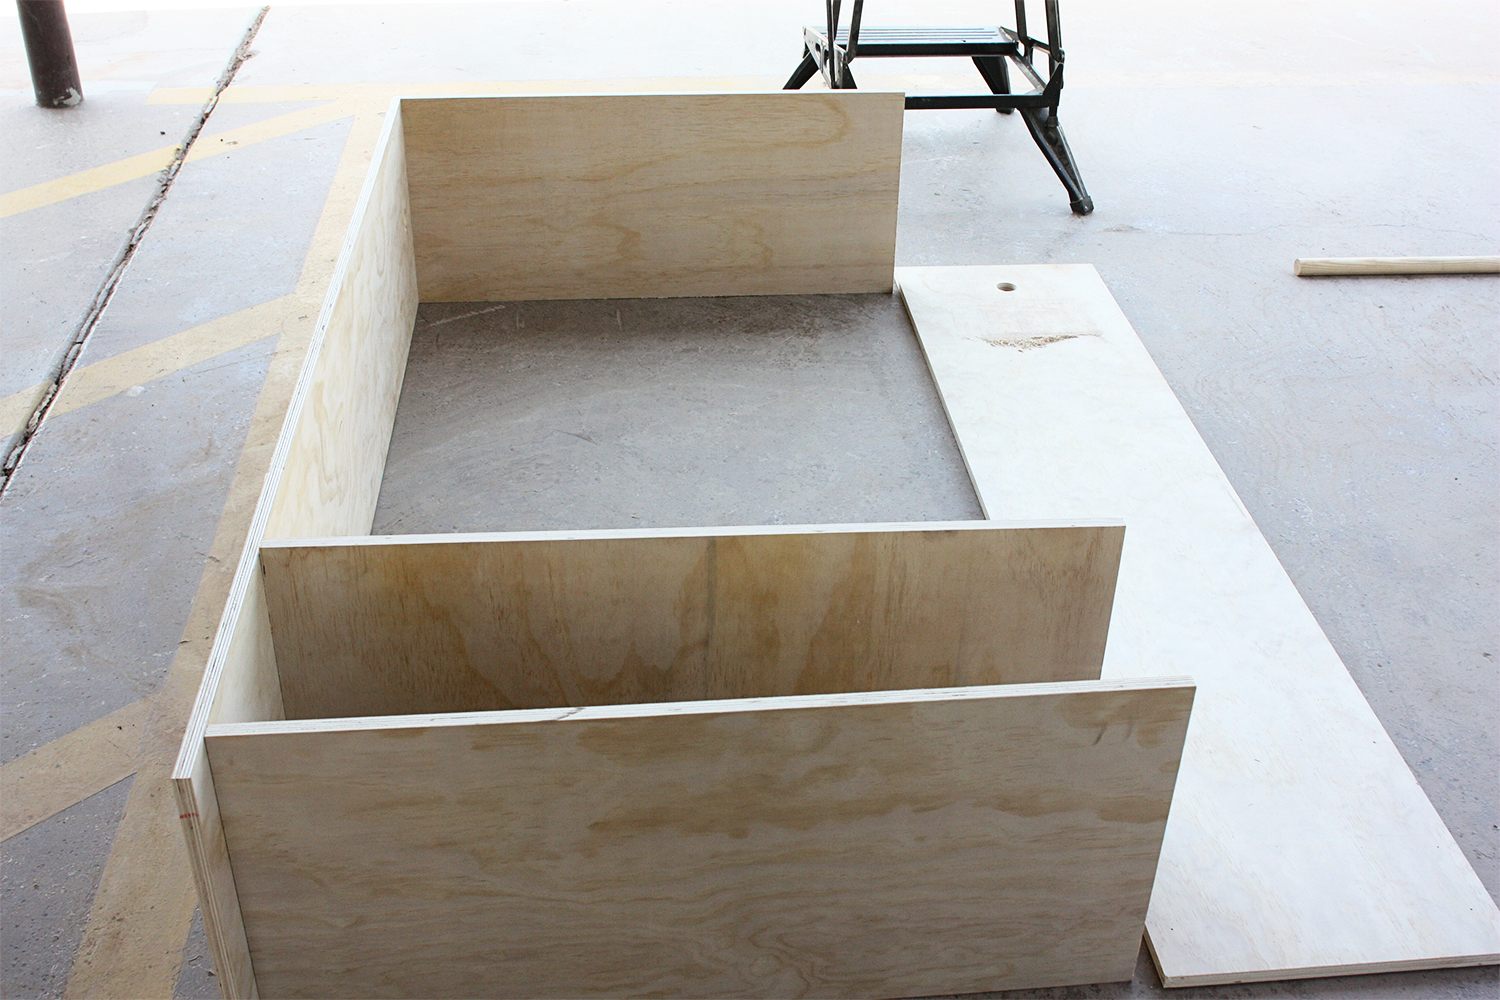
Step Nine: Using the pilot holes you’ve already made as guides, make pilot holes in the shelves. Then, drill screws into the two pieces of wood on both sides. Repeat this process on the bottom, middle and top pieces of wood. Flip and repeat!
Step Ten: Clean up your final piece with the sanding block to smooth out any rough edges!

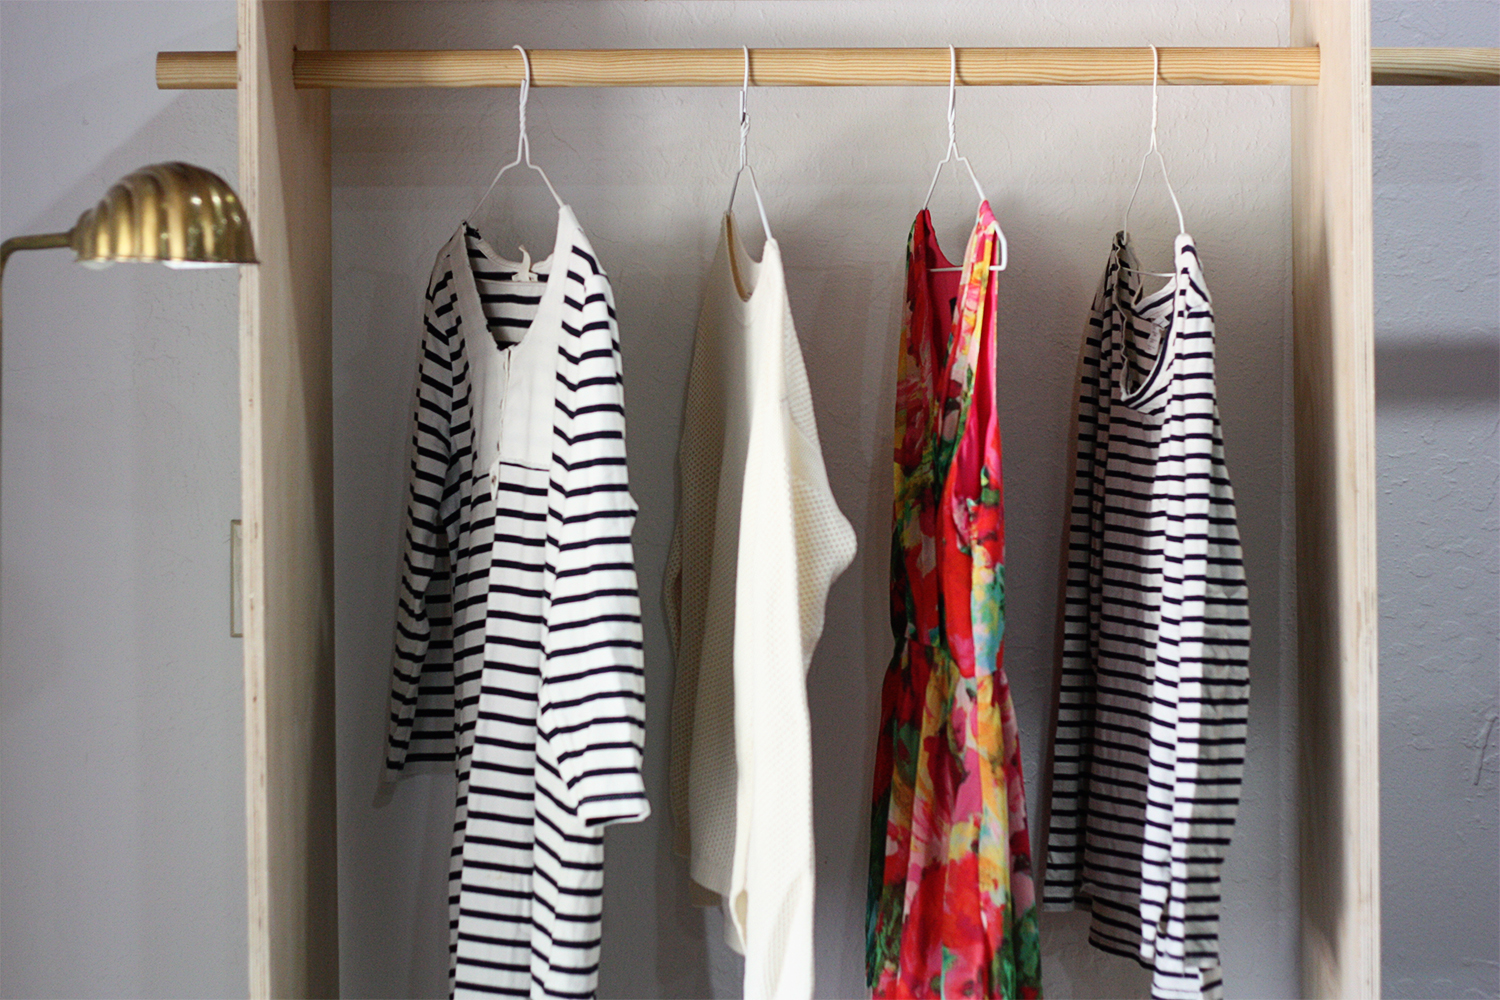

This would the perfect project if you’re in need of some extra closet space, or are wanting a pretty way to display your favorite pieces. I love, love how this turned out and will be filling it up with my most cherished blouses, dresses and shoes soon! This would be the perfect spot to plan out daily outfits, or just as a place for style inspiration! The options are endless!
If you would like to see more DIY collaborations like this, please let Scott and I know in the comments!
-Chelsea & Scott xo